Firstly, I have to say that every home would have a different network setup. So let me talk about the setup I got a bit:
I don’t have cable and I don’t have ADSL. Only thing I got is a mifi device with a Viva subscription chip. It is basically a Huawei device that looks like this:

I got 4 computers and a smartphone that connect to the mifi device (wirelessly )
As one would image with devices that come with a subscription, I don’t have much control over its settings. To setup an IDS one would need to at least to mirror traffic to a port or a machine. There’s no way I could do that here.
So, before settings up the IDS, I needed to add more flexibility to my network.
Updating my Network Infrastructure
I decided to buy a TP-Link TL-WR1043ND.

Why, you ask? It was the first one I found that support OpenWRT, which I will talk about below.
Topology-wise, I needed something like this:
- One wireless switch that accepts both wireless and cable connection
- The wireless switch should act as an access point to the mifi device that connects to the Internet.
The Switch in this case that will act as an access point will be the TP-Link router
After that I will make sure to set up port mirroring on the router such that all traffic inbound/outbound will be copied and sent to an IDS sensor, which is also physically connected to the TP-Link router via an Ethernet cable.
Let’s start with turning the TP-Link router to an access point to the mifi point
Setting up TP-Link with OpenWrt
The original firmware wouldn’t support turning the router to an access point. So, I had to flash something that had more functions. And the first that came to mind was OpenWrt. OpenWrt is one of the most widely used firmwares around. It incorporates a lot of the functions needed in a home router. So I flash the firmware used for my TP-Link model, which is here. I flashed “Attitude Adjustment”.
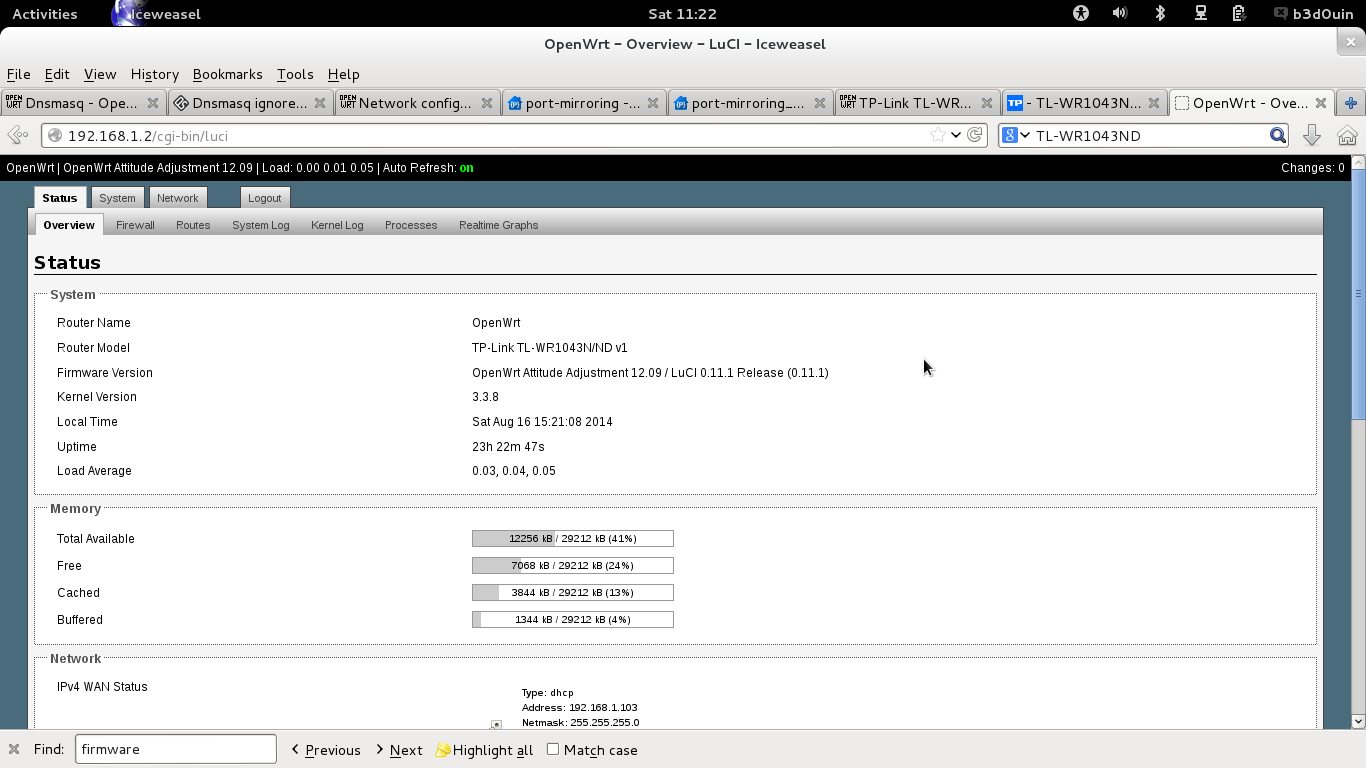
This what the original page looks like before flashing:

And here’s what the router web interface looks like under OpenWrt
Ok. So, now that I have OpenWrt on my router. I need to setup the access point, and connect it to my mifi device. I shamelessly copied this from here. This was a question I asked in the OpenWrt forums.
- The steps are pretty much straight forward:
Log into the luci webgui - Click on wifi under the network tab
- Click on edit behind the wirless network
- Set all settings for your private wifi network as desired (security and ssid)
- Save and apply the settings
- Enable the wifi radio, by clicking the enable button behind the wifi network
- Click on the scan button
- In the list that appears, click on ‘Join network’ for the appropriate network you want to connect to
- Untick ‘Replace wireless configuration’
- Fillout the WPA/WEP passphrase if that’s needed
- Click on submit
- And save and apply the unsaved changes
One more thing I need to do is to setup the nameserver for this interface that is set as an access point:
I edit /etc/config/network and make it look something like this:
root@OpenWrt:~# cat /etc/config/network

config interface 'loopback'
option ifname 'lo'
option proto 'static'
option ipaddr '127.0.0.1'
option netmask '255.0.0.0'

config interface 'lan'
option ifname 'eth0.1'
option type 'bridge'
option proto 'static'
option netmask '255.255.255.0'
option ipaddr '192.168.1.2'
option dns '8.8.8.8 8.8.4.4'
Do I have Internet on the TP-Link router?
BusyBox v1.19.4 (2013-03-14 11:28:31 UTC) built-in shell (ash)
Enter 'help' for a list of built-in commands.

_______                     ________        __
|       |.-----.-----.-----.|  |  |  |.----.|  |_
|   -   ||  _  |  -__|     ||  |  |  ||   _||   _|
|_______||   __|_____|__|__||________||__|  |____|
|__| W I R E L E S S   F R E E D O M
-----------------------------------------------------
ATTITUDE ADJUSTMENT (12.09, r36088)
-----------------------------------------------------
* 1/4 oz Vodka      Pour all ingredients into mixing
* 1/4 oz Gin        tin with ice, strain into glass.
* 1/4 oz Amaretto
* 1/4 oz Triple sec
* 1/4 oz Peach schnapps
* 1/4 oz Sour mix
* 1 splash Cranberry juice
-----------------------------------------------------
root@OpenWrt:~# ping www.google.com
PING www.google.com (173.194.124.48): 56 data bytes
64 bytes from 173.194.124.48: seq=0 ttl=53 time=53.207 ms
64 bytes from 173.194.124.48: seq=1 ttl=53 time=50.760 ms
64 bytes from 173.194.124.48: seq=2 ttl=53 time=59.722 ms
64 bytes from 173.194.124.48: seq=3 ttl=53 time=96.626 ms
^C
--- www.google.com ping statistics ---
4 packets transmitted, 4 packets received, 0% packet loss
round-trip min/avg/max = 50.760/65.078/96.626 ms
Yes, I do, which means the TP-Link router is connected to the mifi and I can connect my machines directly to the router and have access to the Internet.
Ok…good: now let’s see if I can setup port-mirroring on this router.
Setting up Port-mirroring
I found something really convenient on google code: It’s simply called port-mirroring, and works on OpenWrt 🙂
I noticed that the protocols it supports for port mirroring is “TEE” and “TZSP”.
Here is what the Project Home page says:
“TEE” format mirroring is added in version 1.3. Since version 1.3, you can choose “TEE” or “TZSP” as the mirroring protocol.
If you don’t know what TZSP is, it’s a protocol used to encapsulate layer 2 packets in UDP datagrams. This is perfect for my scenario since I want the mirrored packets to be forwarded to a host. Seems to me a lot easier then the “TEE” option.
Ok, so I download port-mirroring on my openwrt flashed router and install it.
root@OpenWrt:~# opkg update
root@OpenWrt:~# opkg install http://port-mirroring.googlecode.com/files/port-mirroring_1.3-1_12.09_ar71xx.ipk
I then make sure the protocol it uses it “TZSP” and the IP address the packets go to is 192.168.1.64.
root@OpenWrt:~# cat /etc/config/port-mirroring
#
#"target" defines the mirror target, it can be a local interface or a remote ip
#address. For openwrt routers, it shall be remote ip in most case.
#
#"source_ports" defines the mirrored interface, for example, "wlan0" will mirror#all wireless traffic. Multiple interfaces are supported(ie: "wlan0,eth0").
#

config 'port-mirroring'
option "target" '192.168.1.64'
option 'source_ports' 'br-lan' 'br-wan'
option filter ''
option 'protocol' 'TZSP'
root@OpenWrt:~#
and I start the port-mirroring functionality:
root@OpenWrt:~# /etc/init.d/port_mirroring start
Now, it’s time to check the IDS monitor with IP 192.168.1.64, is it receiving any traffic:
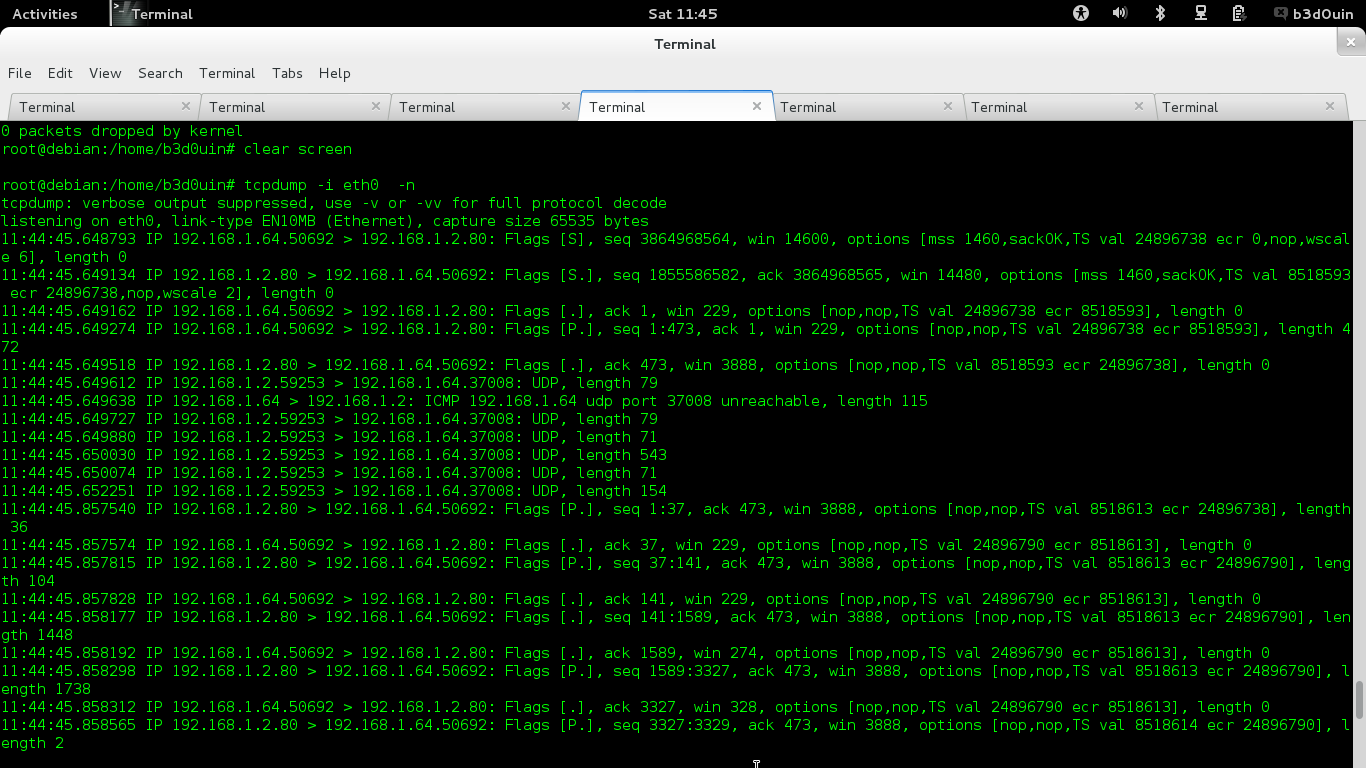
Well, the good news is it is receiving traffic. Bad news is, as you would expect, it is encapsulated with UDP, which is expected with TZSP. Notice there is other traffic, which is just noise. Can’t send the traffic to the IDS sensor encapsulated. (Well, I could, but would add a lot of overhead and would affect its accuracy).
So, I need to remove the UDP datagram to get the “real” network packets.
“Decapsulating” TZSP Packets
What really comes to rescue here is Scapy. Scapy is a tool that allows me to mess around with packets. It has a python library that I will use to remove the UDP details. I first tell the program to monitor everything on ‘eth0’ and then for all UDP datagrams it should remove the TZSP encapsulation and send the traffic to ‘eth1’. (I consider this safe, since I only expect TZSP traffic to arrive on this laptop if it is UDP).
The code looks like the below:
from scapy.all import *

def writep(packet):

    udp_packet = packet.payload.payload

    tzsp_packet = udp_packet.payload
    tzsp_packet_str = str(tzsp_packet)

# remove 4 bytes of header plus first 2 bytes of tagged fields, last byte will give us how many more bytes we need to remove

    tzsp_minus_header_str = tzsp_packet_str[5:]

    try:

        tzsp_decapsulated_packet = Ether(tzsp_minus_header_str)
    except:
        return

    sendp(tzsp_decapsulated_packet,iface="eth1",realtime=True)
def main():
    sniff(iface="eth0",filter="udp",prn=writep)

main()
I, of course, need to create the dummy virtual interface ‘eth1’ since I do not actually have it. This is straight-forward on Debian
root@debian:/home/b3d0uin# ip link add name eth1 type dummy
root@debian:/home/b3d0uin# ip link set promisc on
root@debian:/home/b3d0uin# ip link set dev eth1 promisc on
root@debian:/home/b3d0uin# ip link set eth1 up
I run the scapy code in the background (of course, I need to have python installed on machine).
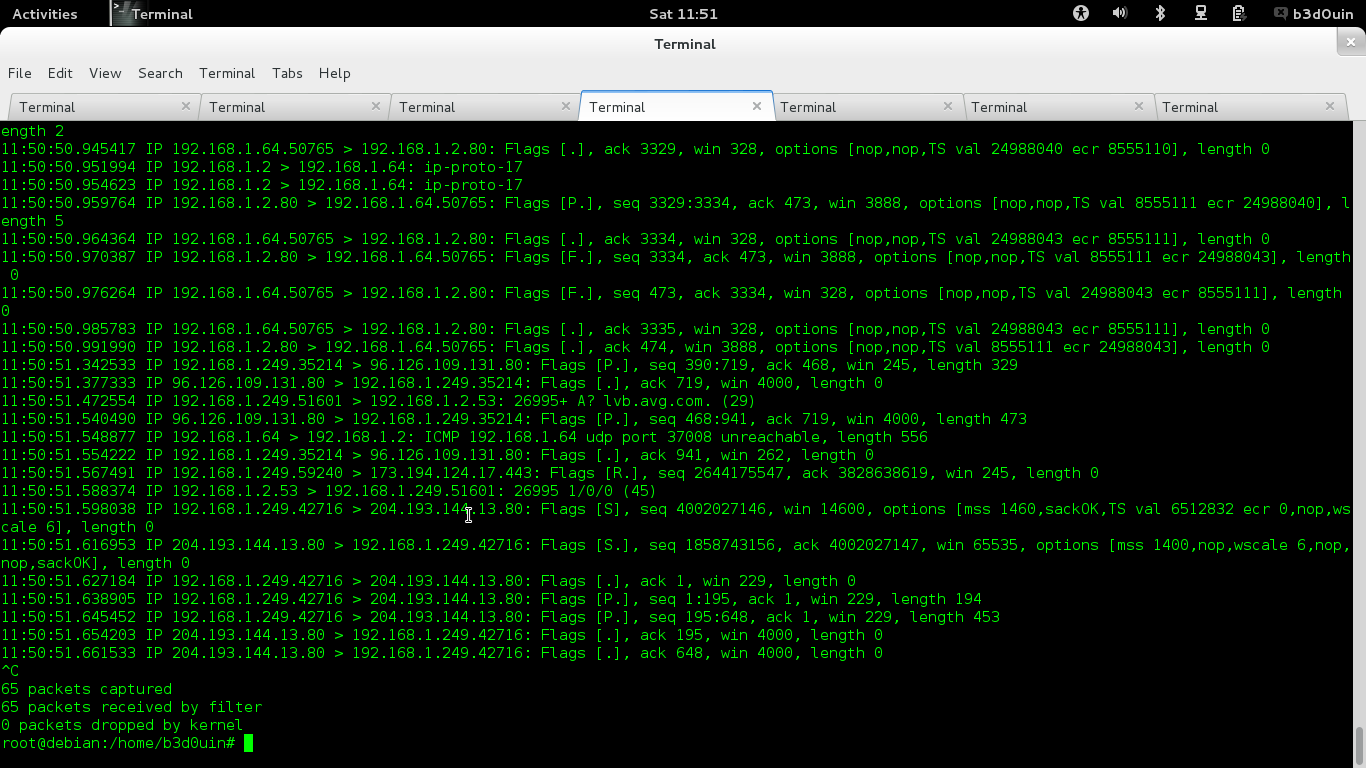
OK. I will start up my program and take a look at the traffic on eth1 this time:
and on wireshark after visiting a website from my phone which is connected to the TP-Link switch:
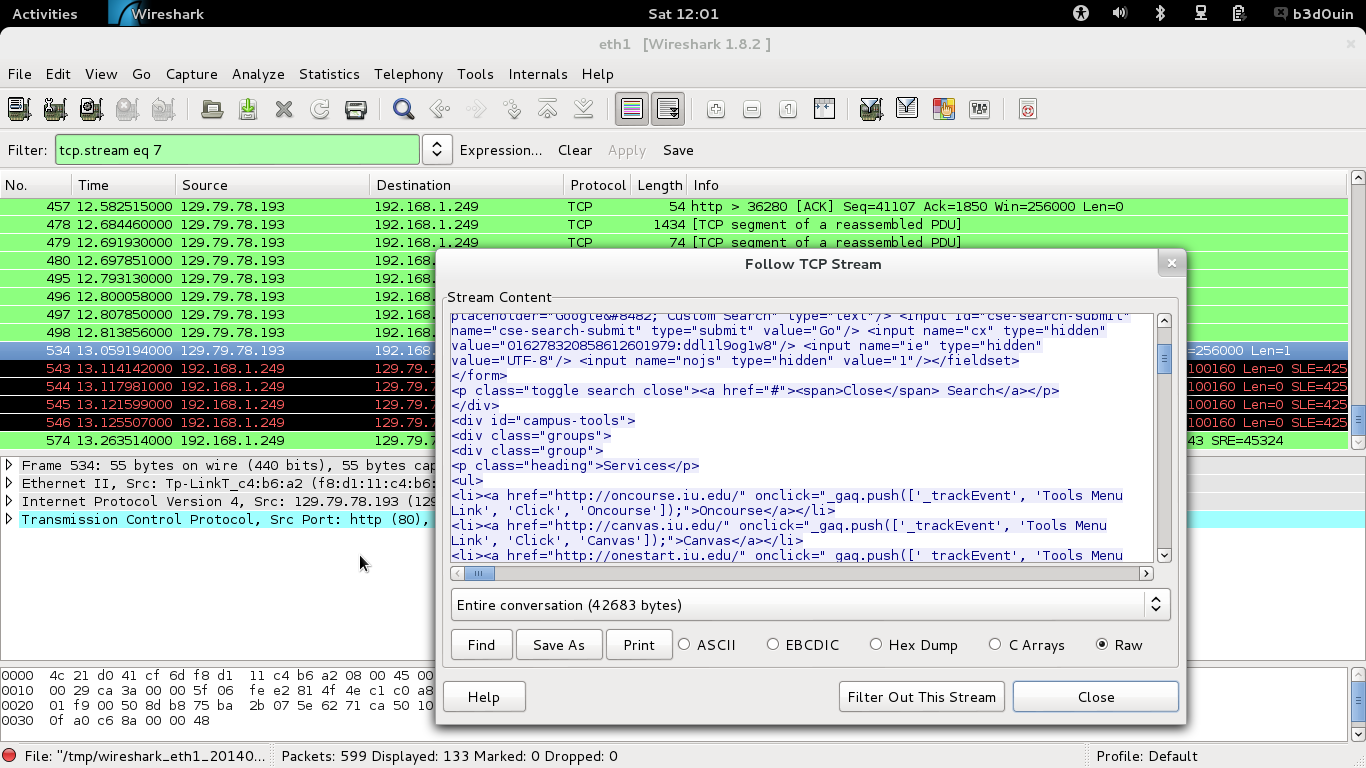
Boom! I have traffic on ‘eth1’
Setting up and IDS Sensor (Bro):
It is all downhill from here, I need to install an IDS. I picked Bro
I downloaded Bro 2.2 since at the time of writing it is the stable release.
I need to make sure it points to ‘eth1’ by editing node.cfg under /usr/loca/bro/etc/ and set the interface as ‘eth1’
# Example BroControl node configuration.
#
# This example has a standalone node ready to go except for possibly changing
# the sniffing interface.

# This is a complete standalone configuration.  Most likely you will
# only need to change the interface.
[bro]
type=standalone
host=localhost
interface=eth1
I then start bro
root@debian:/home/b3d0uin# /usr/local/bro/bin/broctl

Welcome to BroControl 1.2

Type "help" for help.

[BroControl]> start
Is bro receiving? One way is to test is to connect my smartphone to the TP-Link router and visit a website, and then check http.log under /usr/local/bro/logs/http.log
and it looks like it worked:
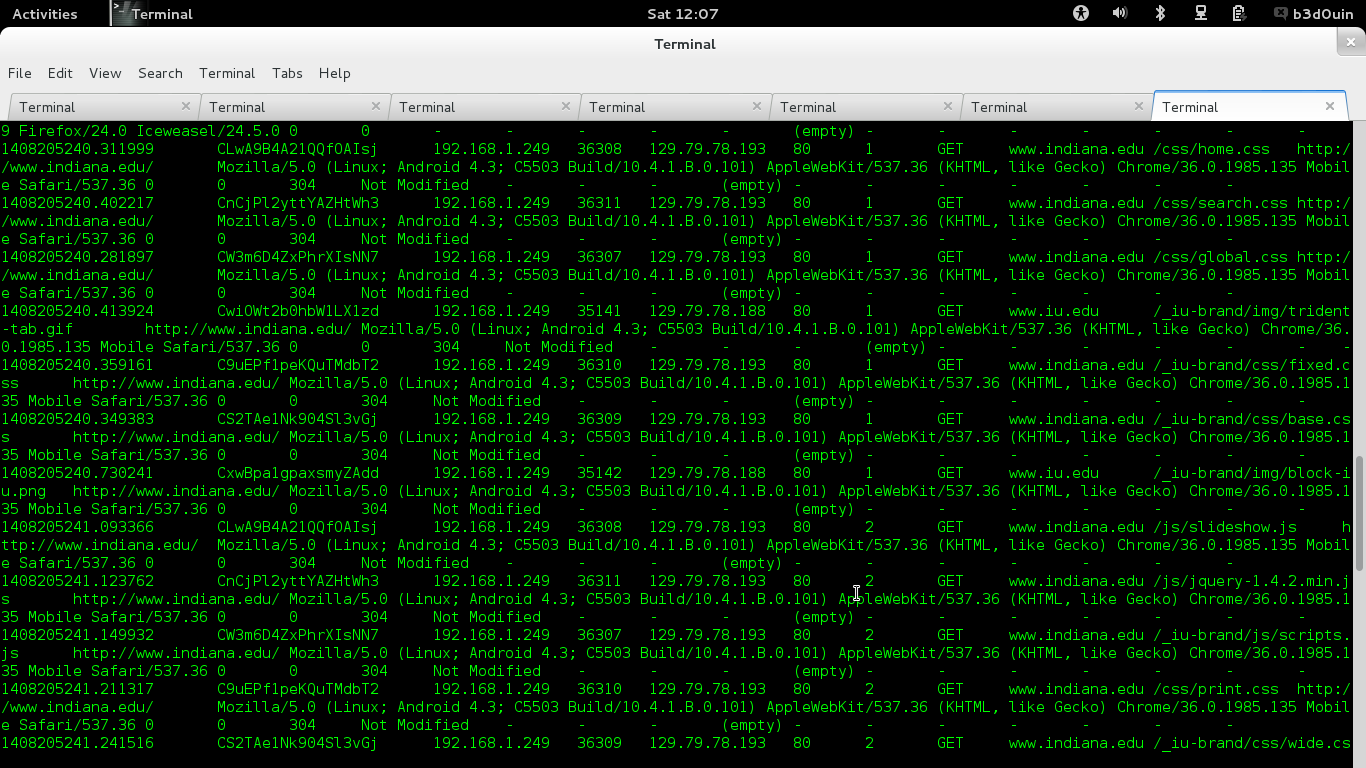
and that’s it!
I have an IDS installed on my home network. Of course, this is just the beginning. I need to tune the IDS and test it, of course. I have no doubt that there might be something I’m missing in terms of port mirroring and directing traffic since I’ve done this real quick. But if there is anything it will show up sooner or later 🙂 Notice that by using TZSP I don’t really need the sensor to be directly connected to the cable. It could be on the Internet for all we care.
Ok, this was a long post, but I really couldn’t find a less complicated way of doing what I did given my initial network setup. I hope in upcoming posts I can talk more about doing stuff on the actual IDS.